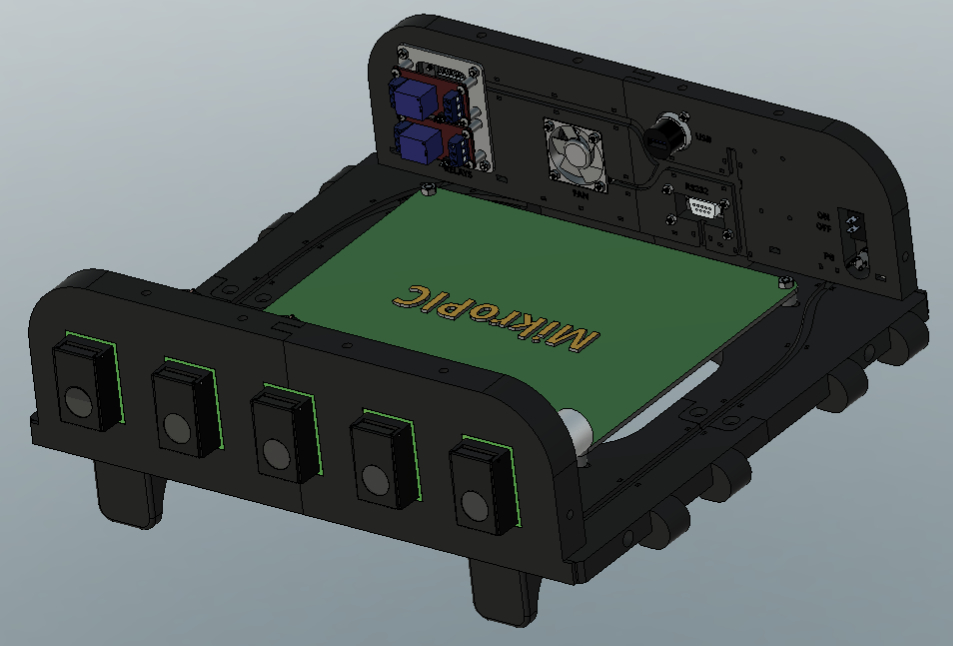
4. Frame and panel assembly
Parts
- 4 M6 Nuts
- 4 M6x45
- 1 USB A to B cable
- 4 M4 Nuts
- 4 M4x20
- 12 M4 Threaded Inserts
Tools
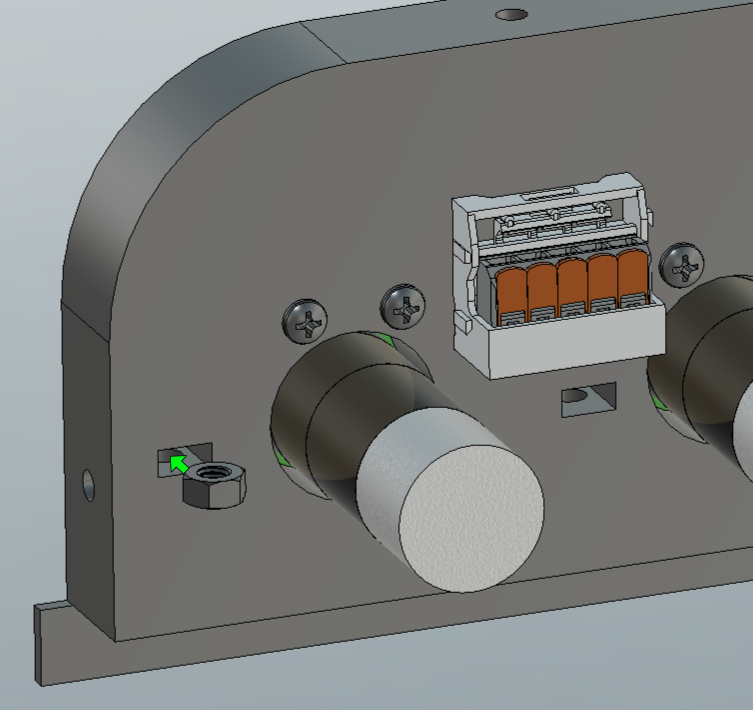
Step 1: Fix the front panel
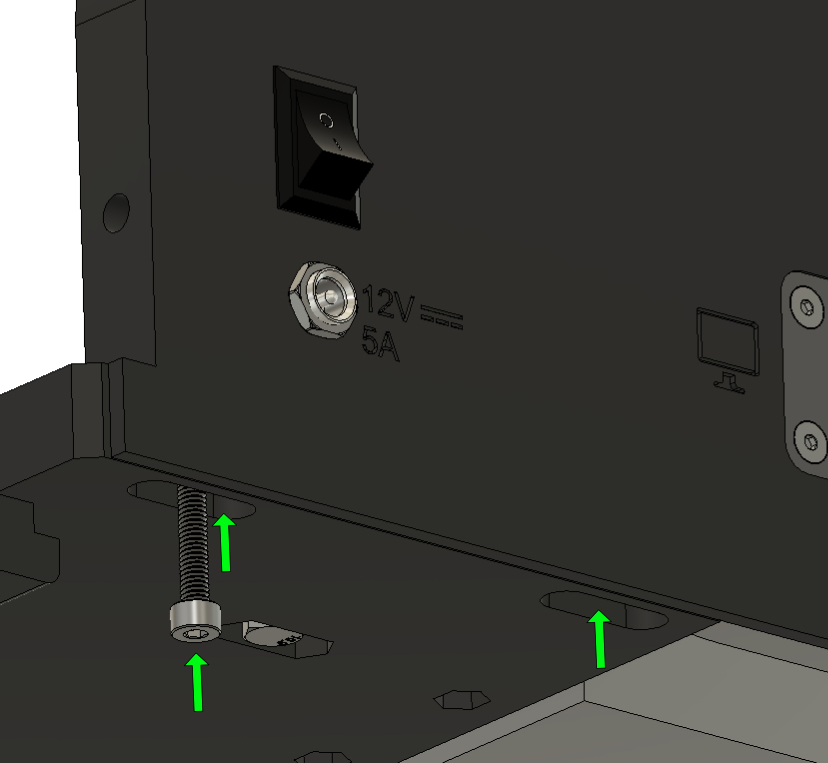
- Put M6 Nuts (x4) one by one inside the holes of the front panel (first picture) and screw it from the bottom by screwing 4 M6x45 from under the frame (second picture).
!! Do not tighten, the frame must be able to move !!
- Check if your assembly is like the picture.
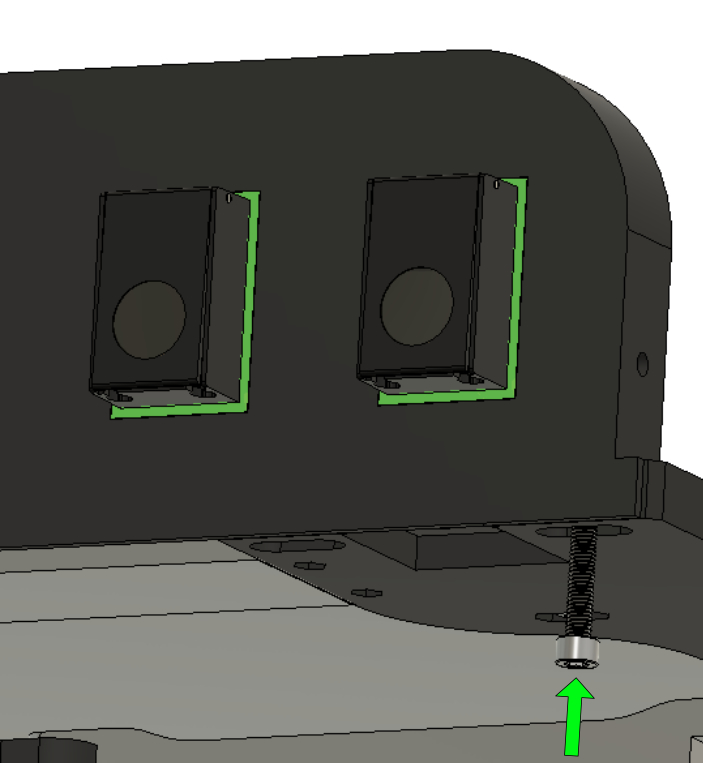
Step 2: Fix the rear panel
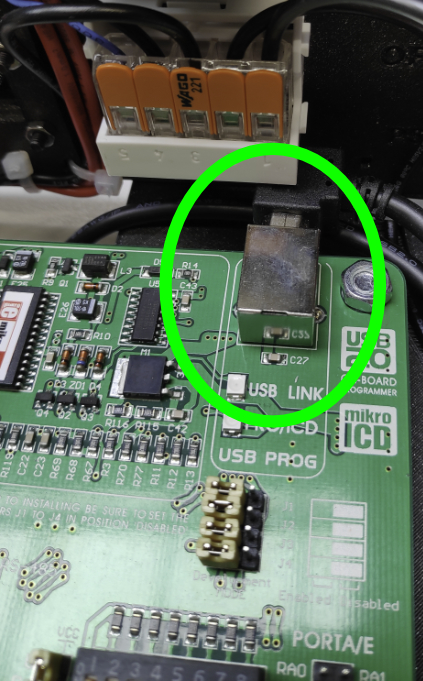
- Insert the USB A to B cable into the connector on the motherboard because if you try to put the cable after attaching the rear panel it will be not easy.
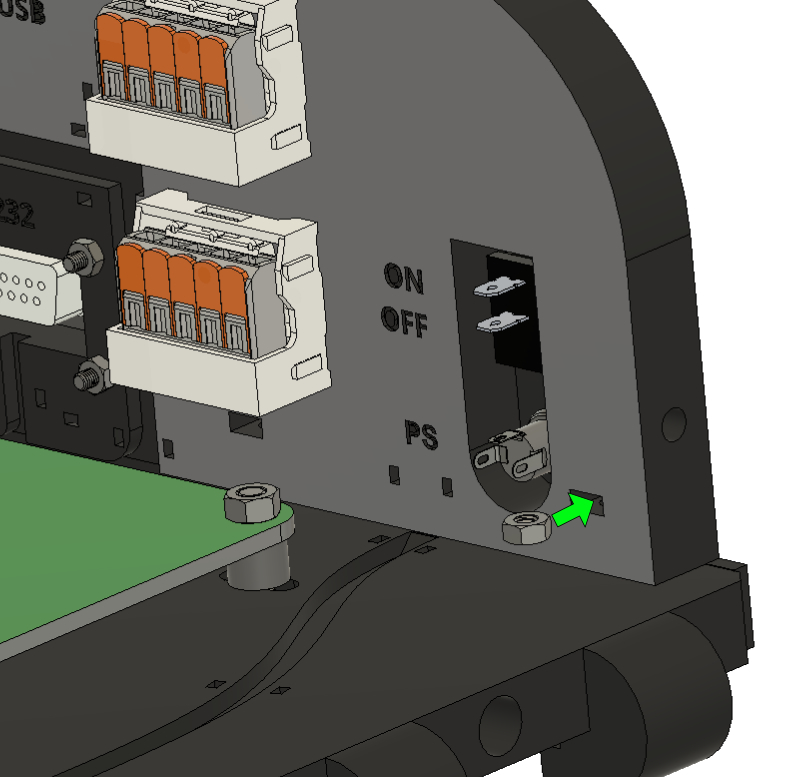
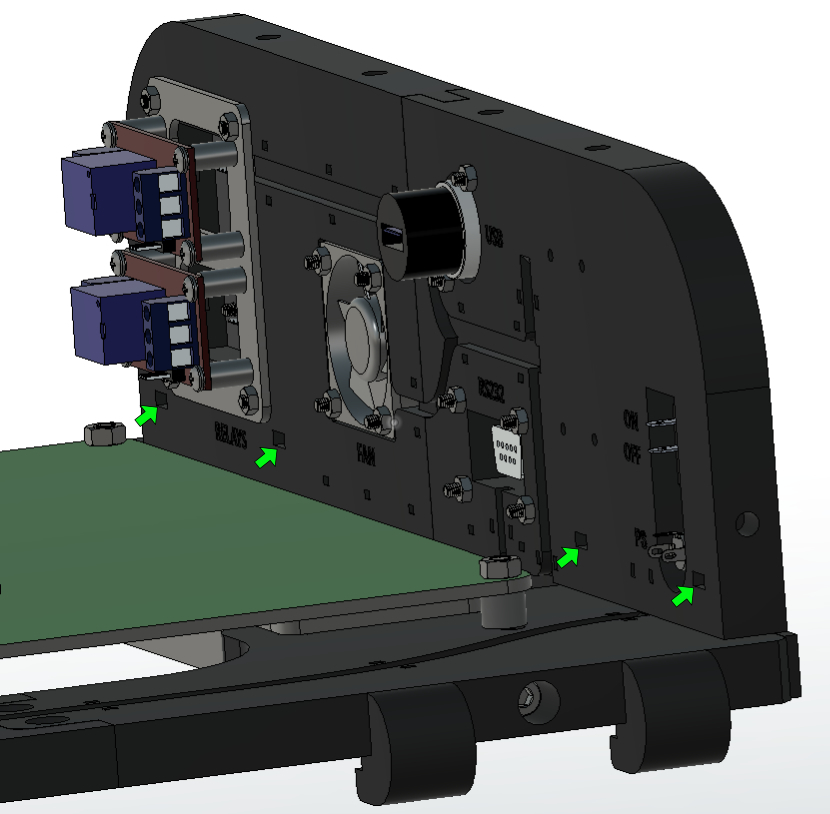
- Put M4 Nuts (x4) (first & second picture) one by one inside the holes of the back panel and screw it from the bottom by screwing M4x20 (x4) (third picture) from under the frame.
!! Do not tighten, the frame must be able to move !!
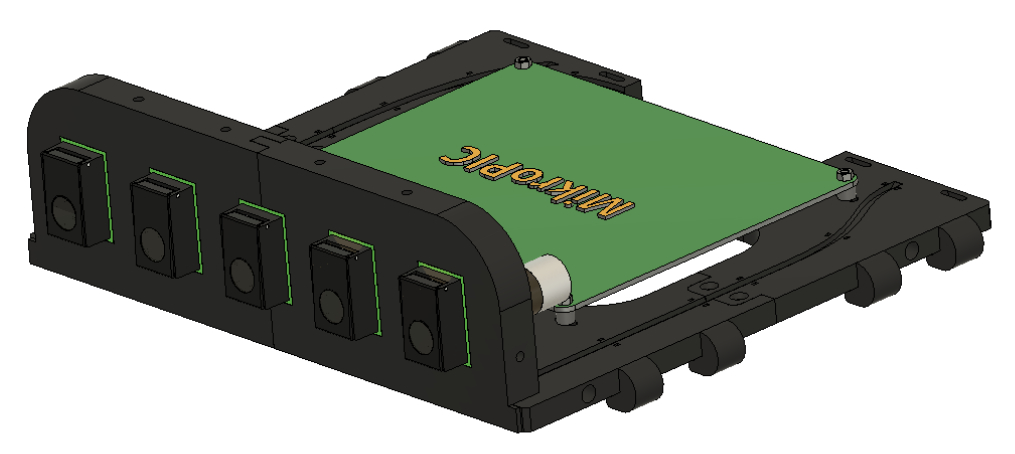
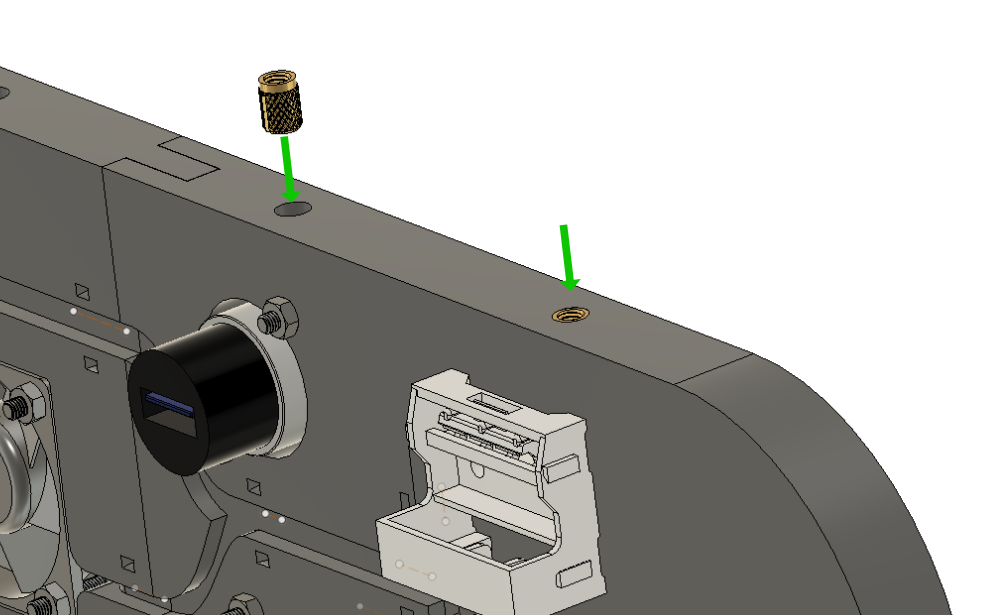
Step 3: Threaded Inserts
Put the M4 Threaded Inserts inside the top holes on the front and back panel. Use the tip of a hot soldering iron to heat the insert and push slightly to make the plastic soft on the surface layer and facilitate the insertion
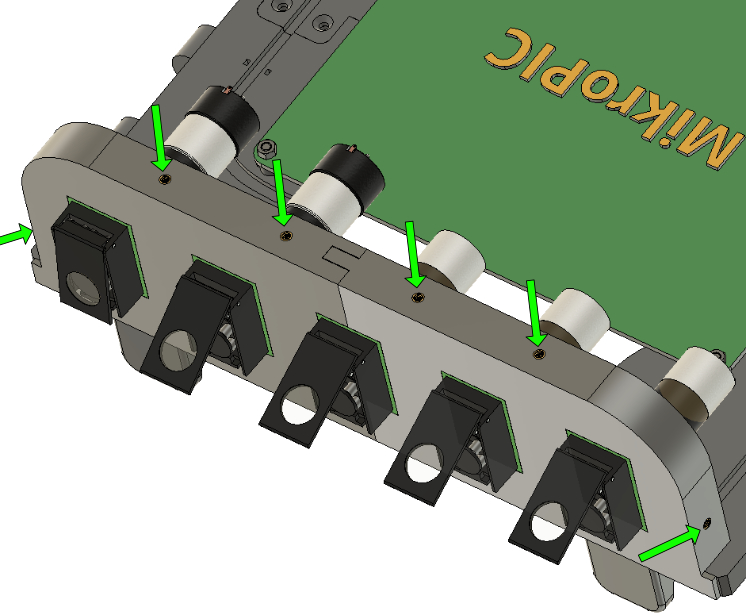
- Your assembly should look like the picture below: